
Background
GitHub Actions provides a generous free tier, but it comes with specific limitations. The free usage is typically 2,000 minutes per month for standard GitHub-hosted runners. If your team has a bunch of repositories or jobs to run, you may quickly meet this limit. So what should we do after meeting the free usage? There are three common solutions:
- Upgrade to a GitHub Team or Enterprise plan.
- Build our own automation server to use tools like Jenkins.
- Add our own self-hosted runner to GitHub Actions.
Since upgrading GitHub plans can be costly for some teams, and setting up a Jenkins server adds significant overhead, this post will focus on the third option: adding a self-hosted runner to GitHub Actions. This approach allows us to leverage the power and integration of GitHub Actions while gaining control over our build environment and avoiding minute limits.
What is a Self-Hosted Runner?
A self-hosted runner is a machine that you manage and maintain, which has the GitHub Actions runner application installed on it. This application connects to GitHub and waits for jobs to be assigned to it from your repositories' workflows. When a job is assigned, the runner executes the steps defined in your workflow on its local environment.
Comparison with GitHub-hosted runners:
| Feature | GitHub-Hosted Runner | Self-Hosted Runner |
|---|---|---|
| Management | Managed by GitHub | Managed by you |
| Cost | Billed per minute (free tier available) | Your infrastructure cost (no GitHub minute charges) |
| Environment | Standardized, pre-configured VMs (Ubuntu, Windows, macOS) | Any OS/hardware you choose, fully customizable |
| Network Access | Public internet access | Can access private networks/resources |
| Software | Pre-installed common tools | Install any software you need |
| Scaling | Automatically scales | You manage scaling |
| Security | GitHub-managed security | Your responsibility |
Use cases for self-hosted runners:
- When you've exhausted your free GitHub Actions minutes.
- When your build process requires specific hardware (e.g., GPUs, specialized processors).
- When you need to access resources within a private network (e.g., internal databases, artifact repositories).
- When you need to install custom software or tools not available on GitHub-hosted runners.
- To reduce overall CI/CD costs by utilizing existing or cheaper infrastructure.
Prerequisites
Before you begin, ensure you have the following:
- A Host Machine: This can be a physical server, a virtual machine (VM) in the cloud (AWS EC2, Azure VM, Google Cloud Compute Engine), or even a local machine.
- Network Access: The runner machine needs outbound internet access to connect to GitHub.com. Specifically, it needs to reach
api.github.comandgithub.comover HTTPS (port 443). - User Permissions: A user account on the host machine with permissions to install software and run the runner application. It's recommended to create a dedicated user for the runner for security.
- GitHub Repository/Organization Access: You need admin access to the repository or organization where you want to add the runner.
Adding a Self-Hosted Runner
This guide will focus on setting up a self-hosted runner on a Linux (Ubuntu) machine.
1. Accessing Runner Settings on GitHub
First, you need to navigate to the settings in your GitHub repository or organization to register a new runner.
- For a Repository-level Runner: Go to your repository on GitHub ->
Settings->Actions->Runners. - For an Organization-level Runner: Go to your organization on GitHub ->
Settings->Actions->Runners.
Organization-level runners can be shared across multiple repositories within that organization, which is often more efficient for teams.
2. Generating a Runner Token
Once you are on the Runners page, click on the New self-hosted runner button. GitHub will provide you with a series of commands and a unique registration token. Keep this page open, as you'll need these commands for the next steps.
The token is temporary and valid for a limited time. If it expires, you'll need to generate a new one.

3. Setting Up the Runner Machine
Now, switch to your Linux host machine (e.g., via SSH), and follow the guide to download, configure, and run the server. (Tips: you can run the runner in the background using screen )
Using the Self-Hosted Runner
To make your GitHub Actions workflows use your new self-hosted runner, you need to modify the runs-on key in your workflow YAML file.
If you used the default self-hosted label during configuration, your workflow might look like this:
name: My CI/CD Workflow

on: [push, pull_request]

jobs:
  build:
    runs-on: self-hosted # This targets your self-hosted runner
When you push changes to your repository, GitHub Actions will now pick up this workflow and assign the build job to your self-hosted runner.
Using an Actions Variable to Easily Switch Runners
Sometimes, you might want the flexibility to easily switch to self-hosted if you're nearing GitHub's minute limits. You can achieve this by defining an Actions variable
and using it in your runs-on key.
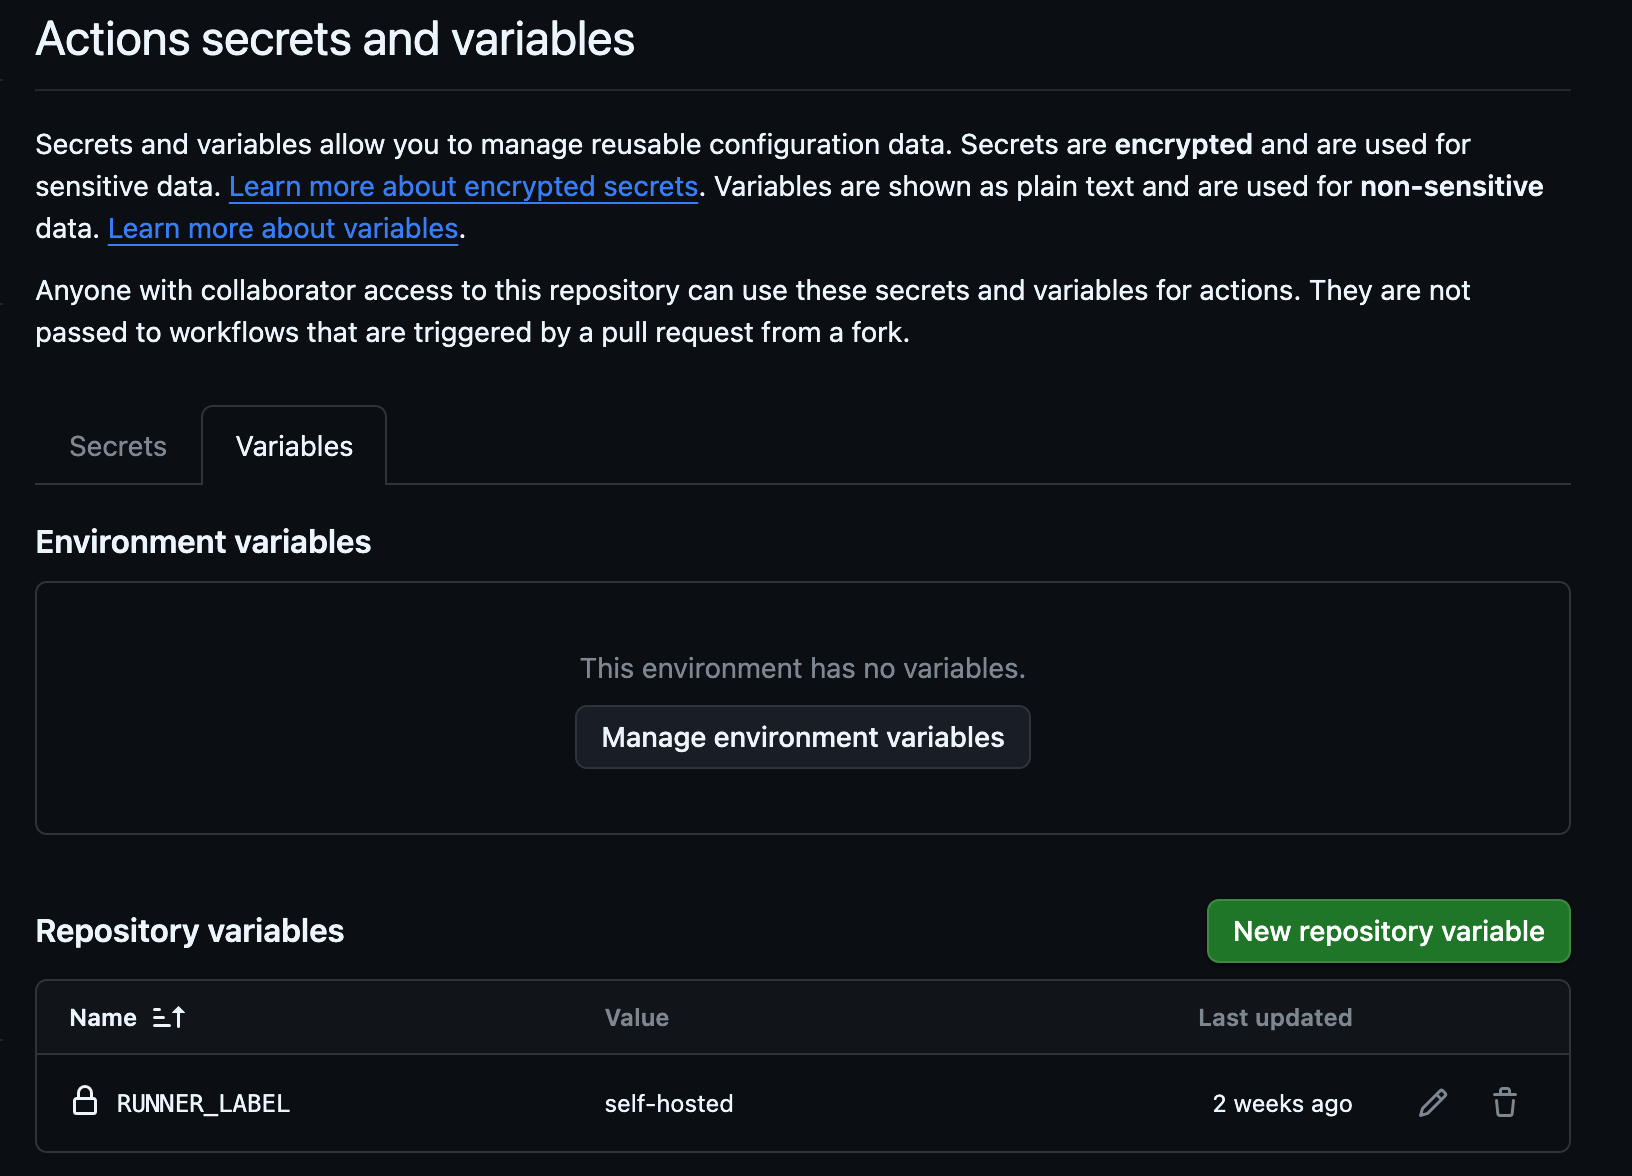
- Define the Variable:
- Go to your repository ->
Settings->Secrets and variables->Actions->Variables->New repository variable. - Name it, for example,
RUNNER_LABEL. - Set its value to
self-hosted.
- Go to your repository ->
- Use the Variable in your Workflow:
name: Centralized Runner Control Workflow

on: [push, pull_request]

jobs:
  build:
    runs-on: ${{ vars.RUNNER_LABEL != '' && vars.RUNNER_LABEL || 'ubuntu-latest' }}
You can set the name to RUNNER_LABEL_DISABLED if you want to use the GitHub-hosted runner, and switch it to RUNNER_LABEL once you reach the free limit. By using this variable, you can change the runner type for workflows by simply updating the variable in GitHub's settings, without modifying the workflow YAML files themselves. This provides a powerful way to manage your CI/CD infrastructure dynamically.
Conclusion
Adding a self-hosted runner to GitHub Actions is a powerful way to extend your CI/CD capabilities, gain control over your build environment, and manage costs effectively. While it introduces some maintenance overhead, the benefits of performance and cost savings often overcome the challenges. By following this guide, you can successfully integrate your own infrastructure with GitHub Actions, ensuring your team's development pipeline remains efficient and robust.